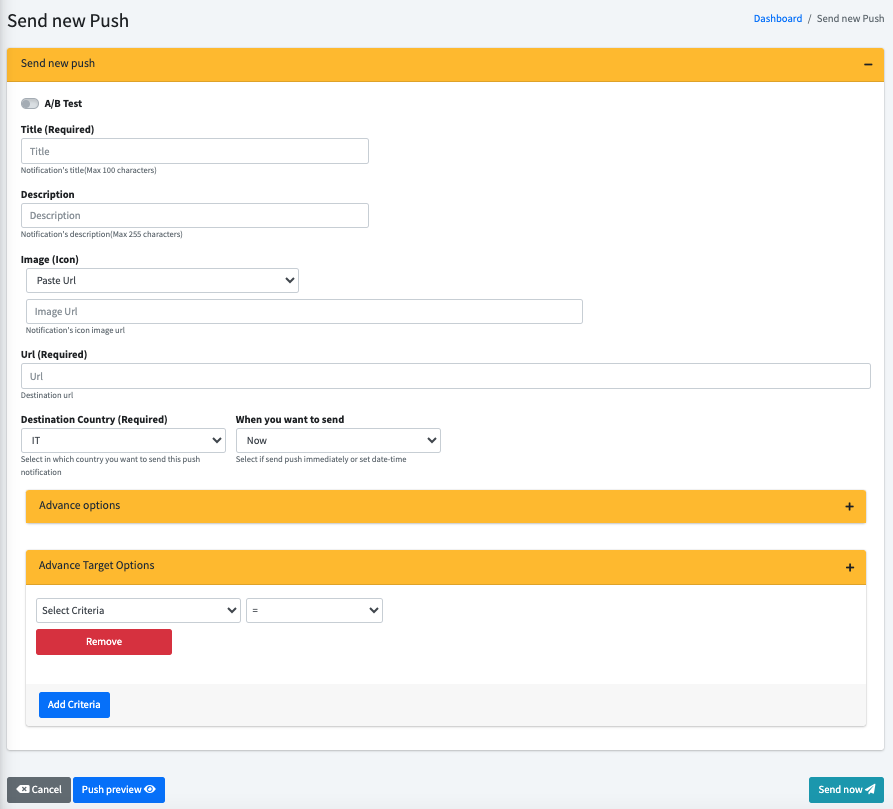
Sending push notifications via the Pushloop platform is a simple and straightforward process. Follow these steps to create and send your push notifications.
- Access your Pushloop dashboard.
- Go to“Manage Site.”
- At your site, click on the “Pushes” button.
- Click on the green“+ Create new Push” button. The“Send new Push” area will open.
Send New Push
Fill in the required fields

- A/B test: Activate this switch if you wish to perform an A/B test.
- Title: enter the title of the notification
- Description: Enter the description of the notification.
- Image (icon): Selection in the Paste Url or Upload image file drop-down menu to enter the URL of the notification image or upload the image file.
- Url: Enter the URL of the landing page for the notification.
- Destination Country: Select the destination country for notification.
- When You Want to Send: Choose Now or set date-time to send the notification immediately or set a specific date and time.
In the “Advance options” area you will find parameters for sending targeted push to your audience broken down by topic. You can find the guide here.
In the “Advance Target Options” area you can select target segmentation parameters thanks to tokens. Learn more about this topic here by reading the guide.
If you choose set the date:
- Set Date: Set the desired date and time.
- Daily Recurrence: If you enable this option, the notification will be sent every day at the same selected time.
Preview and send notification

- Click on the blue“Push preview” button to preview what the notification looks like.
- Click on the green“Save Changes” button to send or schedule the notification.
Congratulations! You have just sent your first push notification from the Pushloop platform!

