What is AMP? AMP (Accelerated Mobile Pages) is a framework created by Google to make websites faster and lighter on mobile devices. It is optimized for performance by limiting the use of custom JavaScript and promoting a simplified site structure. If your site is created entirely with AMP, Pushloop integration requires a specific configuration, different from the standard one.
Here are the steps to install Pushloop on your AMP site.
1. Registration and Site Creation
Follow the official guide here to create an account and set up your site on Pushloop.
2. Access to the AMP Integration Section.
After creating the site, instead of using the classic code shown in the “Manual Integration” guide, you must follow a specific path for AMP:
- Go to “Manage Site.”
- Click on the “Install” button corresponding to your site;
- On the new page, select “AMP Integration.”
AMP integration is divided into three basic steps:
Step 1: Adding the Code in the Head

At this stage, paste the provided script into the <head> section of your AMP site. This code is essential to connect your site to Pushloop and enable notification management.
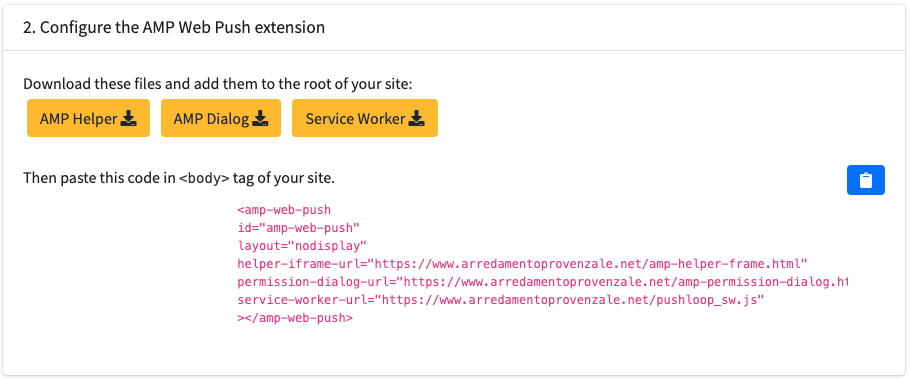
Step 2: Configure the AMP Web Push Extension

- Download the three items needed via the yellow buttons provided in the panel:
- AMP Script: This file handles push notifications in the AMP context.
- Notification consent page: It will help you manage users’ consent to receive notifications.
- Service Worker: This is needed to enable push notifications in the browser.
- Once downloaded, upload these files to the root of your site.
- After completing these steps, paste the code provided into the
<body>tag on your site. This code will cause the notification system to start working.
Note: To accept notifications, since AMP does not allow pop-ups, you must have a non-AMP page open. This requires step 3
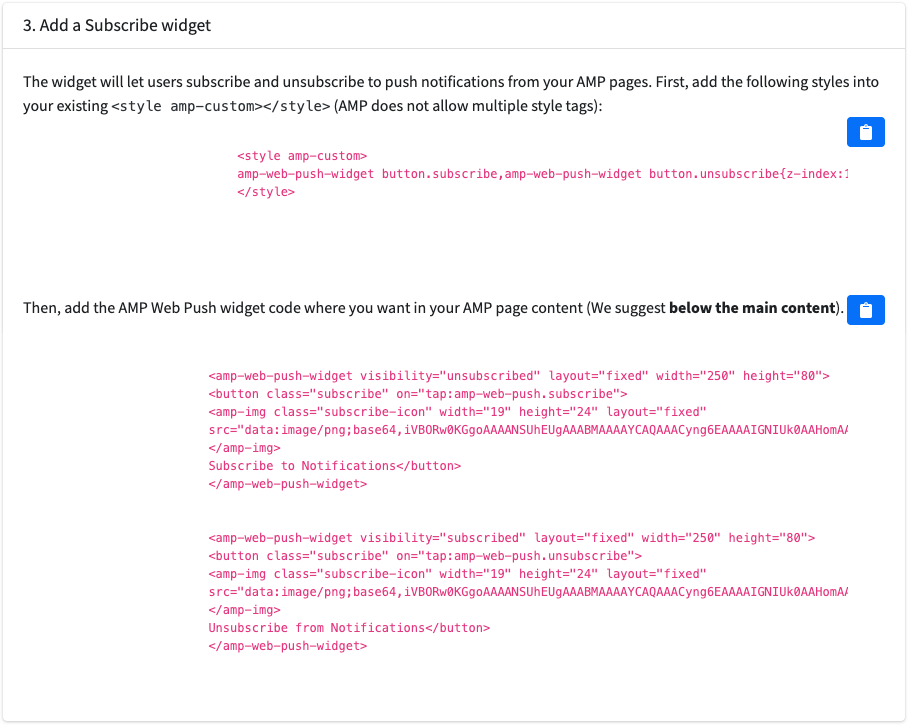
Step 3: Add the Enrollment Widget

Now you need to add subscribe and unsubscribe buttons, which allow users to subscribe to notifications by opening a non-AMP page:
- Button style: you can customize the appearance of buttons that will otherwise have a standard AMP format. To do this, insert the customization code provided by Pushloop into the
<head>tag on your site.


- Subscription button: Visible when the user is not subscribed. Clicking on this button will open a special non-AMP page to allow the user to accept notifications.
- Unsubscribe button: Visible when the user is already subscribed, and is used to turn off notifications.
The code for the two subscribe and unsubscribe buttons should be inserted at the end of the tag <body>, so that they appear at the bottom left when you scroll down the page.
By following these steps, the Pushloop system for AMP will be properly installed and functioning, allowing your users to sign up and receive push notifications on your AMP site.

