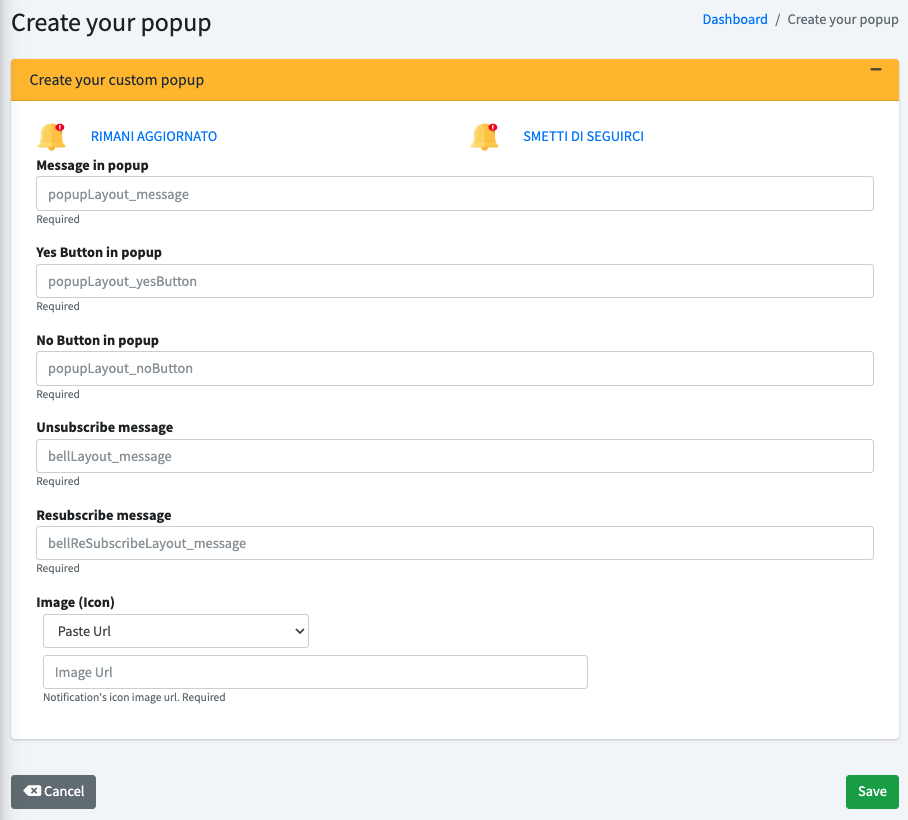
Customizing your site’s push notification sign-up pop-up is a great way to increase engagement and make the user experience more engaging. Follow these steps to configure the custom pop-up on the Pushloop platform.
- Log in to the Pushloop platform: go to the platform and log in with your credentials or, if you don’t have an account yet, register.
- In the main dashboard, on the left column select “Manage Sites.”
- In the site management area, locate your site in the list and click on the corresponding blue “Install” button;
- On the new screen, select the “Manual Integration” option;
- Under “Select Layout,” select “Pop-up Custom.”
- Go to the “4. Customize your pop-up” section, click on the “Customize” button. This will open the “Create your pop-up” area where you can customize the content of the pop-up.

Customize your Pop-up
Now that you are in the area dedicated to customizing the Enrollment Pop-up, you can fill in the relevant fields.
- Message in popup: Enter the main message you want to show in the popup to invite users to subscribe to push notifications.
Example: “Do you want to receive updates from MySite?” - Yes Button in popup: Customize the text of the signup confirmation button.
Example: “Yes, sign me up!” - No Button in popup: Customize the text of the button to decline enrollment.
Example: “No, thank you.” - Unsubscribe message: Enter the message that will be shown to users who wish to unsubscribe.
Example: “Are you sure you want to unsubscribe?” - Resubscribe message: Enter the message that will be shown to users who wish to resubscribe.
Example: “Do you want to receive notifications from MySite again?” - Image (Icon): Enter the URL of the image of the icon you want to show in the pop-up. Make sure the image is representative and of high quality.
Customizing your push notification sign-up pop-up on Pushloop is quick and easy. Create an eye-catching and engaging message to increase user engagement and sign-up rates for your notifications.

