Installing the Pushloop plugin for WordPress is a simple and intuitive process that will allow your site to immediately benefit from the potential of push notifications.
Here’s how to do it:
- Log in to your site’s WordPress administration panel.
- Go to the“Plugins” section and select“Add New.”
- In the search bar, type“Pushloop” to find our plugin.
- Once found, click on “Install Now” next to the Pushloop plugin.
- After installation, click“Activate” to get the plugin up and running on your site.
Plugin Configuration
Once you have installed the Pushloop plugin for WordPress, the next step is to configure it. This process will allow you to connect your WordPress site to the Pushloop platform, ensuring that push notifications are sent correctly to your visitors.
Here is how to proceed:
- Log in to Pushloop or create a new account: If you do not yet have a Pushloop account, register on our platform. Otherwise, log in with your credentials.
- Add your site to the platform: In the Pushloop dashboard, look for the “Manage Sites” section and click on “Add New Site.” Fill in the required fields, entering the name and URL of your site, and then click “Create.” Your site will now appear in the list with a unique identifier.
- Copy the Site Identifier: Make a note of the unique identifier associated with your site in the “Manage Sites” list. This code will come in handy in the next step.
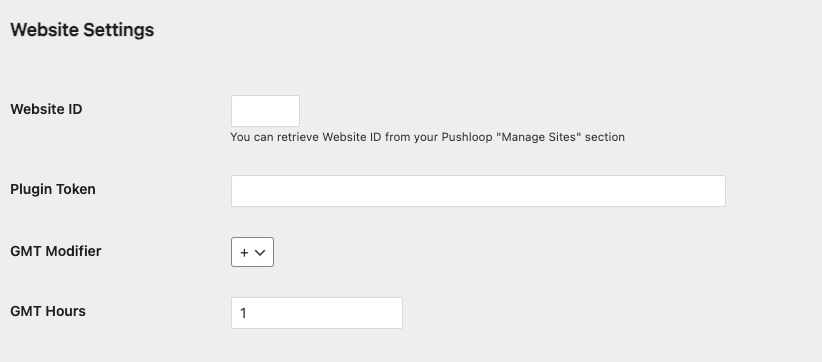
- Enter the identifier in the plugin: Go back to your WordPress site and open the Pushloop plugin settings. In the “General Settings” section, you will find a field called “Website ID.” Paste your site ID here.

- Get your Access Token: Return to the Pushloop platform and go to the “Profile” section. Here you will find a field called “Your Token,” which contains the code needed to authenticate your plugin with your Pushloop account.
- Complete the configuration in the plugin: Finally, enter the Access Token found in “Profile” into the “Plugin Token” field within the plugin settings on WordPress.
Having completed this procedure, your WordPress site will be fully integrated with Pushloop, allowing you to send push notifications to your visitors in an effective and personalized way. Remember to save your changes before exiting the plugin settings to ensure that the configuration is applied correctly.
Send Push directly from your WordPress site
With the Pushloop plugin configured, you can immediately start engaging your audience with push notifications directly from the WordPress backend.
Go to the Pushloop plugin under “Send Push“-this is the area dedicated to creating your notifications.
Here you can customize the message you wish to send:
- Headline: Choose a catchy, direct headline that captures your users’ attention.
- Description: Add a brief description explaining the content of the notification.
- URL of Article or Page: Enter the URL to which you want to direct users once they click on the notification.
- Image URL: Select an image that will accompany your push message, making it more visually appealing.
- Timing: Decide whether to send the notification immediately or schedule it for a specific time. You can also choose to send it periodically.
- Send Notification: Once everything is ready, press “Send Push” to spread your push notification to your audience.
This tool turns your WordPress site into a dynamic direct communication platform, allowing you to maintain constant and relevant contact with your readers or customers.
Advanced Settings for E-commerce
If you have Woocommerce installed on your site, thanks to our Pushloop plugin, you will have access to a number of advanced settings specifically designed to maximize the effectiveness of push notifications in the e-commerce context. These settings allow you to customize notifications based on specific events, such as product updates, price changes, order status changes, and more.
Visit the dedicated page on how to install and configure the Pushloop plugin for Woocommerce to learn more about configuring specific settings.

